It’s called embossing paste, texture paste, or just paste. I know it can be intimidating to use new products in your crafting, so today I want to share all about how to use texture paste for card making. Let’s get started!
What Is Texture Paste
Texture paste is a thick material that can be used to add texture, thickness, and interest to your card making and paper projects. I like to compare it to frosting for cakes…but it’s for paper!
What Is Texture Paste Used For?
Embossing paste is used to add…texture! It can be used on a project background, on one layer of your project, on punches or die cuts, or as an embellishment. There are many ways to do this, so keep reading for more ideas.
What Other Supplies Are Needed?
To get started with paste, I suggest having palette knives and a silicone craft mat. You might be able to get away with using plastic silverware instead of the palette knives, but it would be challenging to smooth the paste properly. The silicone mat isn’t required either, but it is very helpful!
How To Store Paste
To store paste, screw the lid onto the jar tightly. I leave the foil and foam liner intact, and sometimes I add a piece of waxed paper to create an even tighter seal. If the lid is not screwed on tight, the paste can dry out quickly.
How To Use Texture Paste
To use embossing paste, get a small amount on a palette knife, and start spreading it onto your project. Pretend you are frosting a cake! You can smooth it, leave it rough, or create any other look you desire.
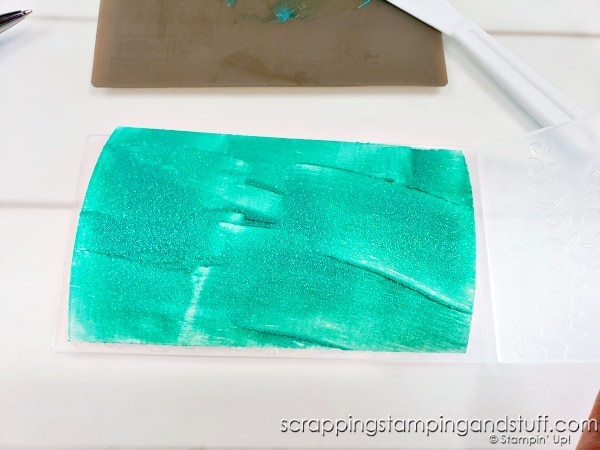
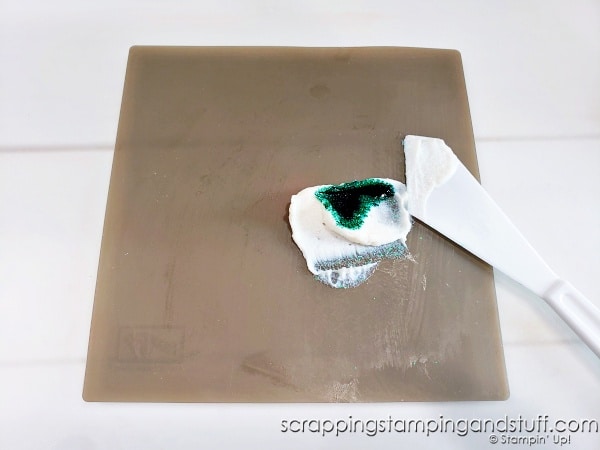
Can Texture Paste Be Colored?
Yes! To add color to paste, place a small amount of paste on your silicone mat, add one or several drops of ink, and mix with a palette knife.
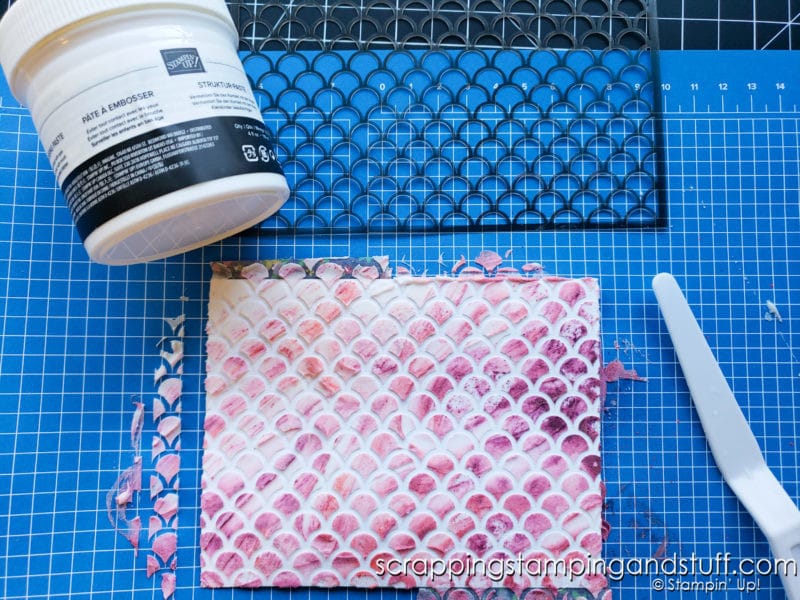
Using Paste With Stencils
To use paste with stencils, place the stencil over your paper using temporary tape or adhesive. Next, spread paste over the top until the desired area is covered. Use the palette knife to scrape extra paste off the top of the stencil, then carefully remove stencil and allow it to dry.
Texture Paste Techniques
There are so many more techniques that can be used with paste. Here are several! For details on any of these techniques, please watch along with the video below.
- Create A Background
- Add Interest To Punches And Die Cuts
- Adding Embossing Powder
- Add Texture With Burlap Or Other Materials
- Stamp It
- Add Sand, Glitter, Or Other Items
- Add Highlights – Think ‘Snow’ On Trees!
- Use With Embossing Folders
- Mix In Pastels
- Mix In Gilded Leaving
Drying Embossing Paste
You can allow paste to air dry, or use a heat tool to speed the process. The heat tool can cause the paste to ‘puff’ which is a fun technique to try!
How Long Does Paste Take To Dry?
Paste can take about 3 to 25 minutes to dry, depending on the thickness of paste used.
How To Clean Up Embossing Paste
Tools need to be cleaned up quickly! Paste can start to dry in a short amount of time, and paste is extremely difficult to remove once dry. I like to clean up tools using warm, soapy water and a stiff scrub brush. A helpful tip is to keep a bowl of water at your craft space, and place supplies in it until you have time to clean them completely.
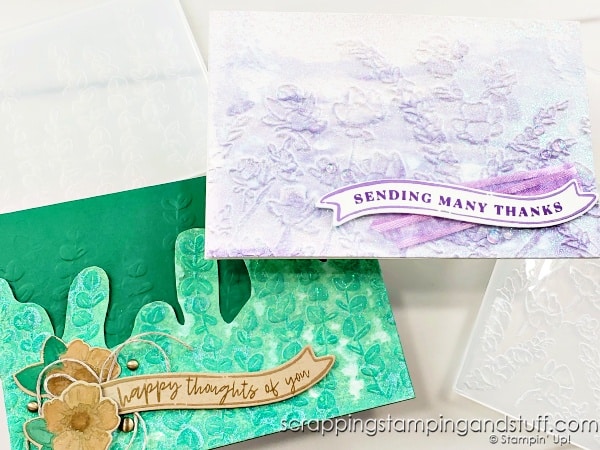
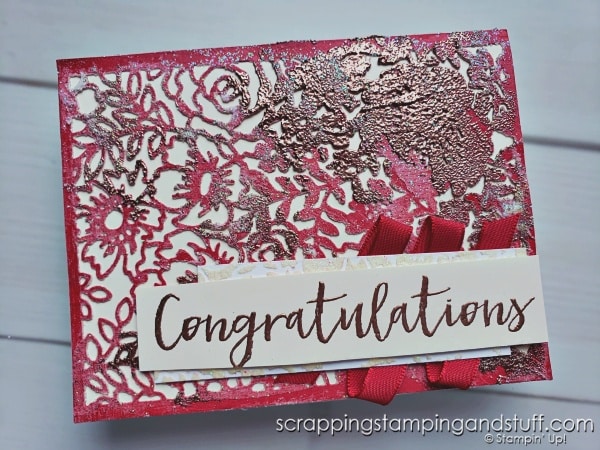
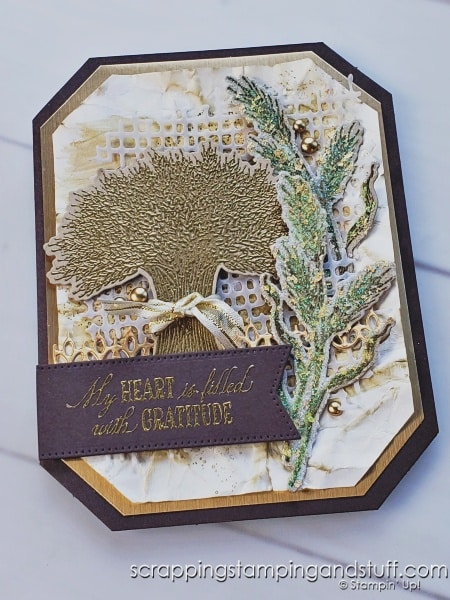
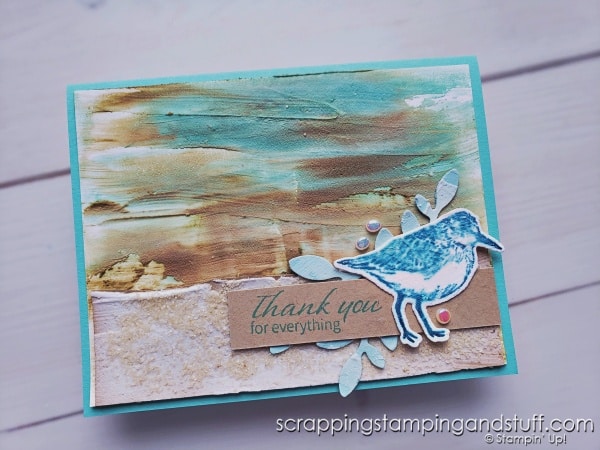
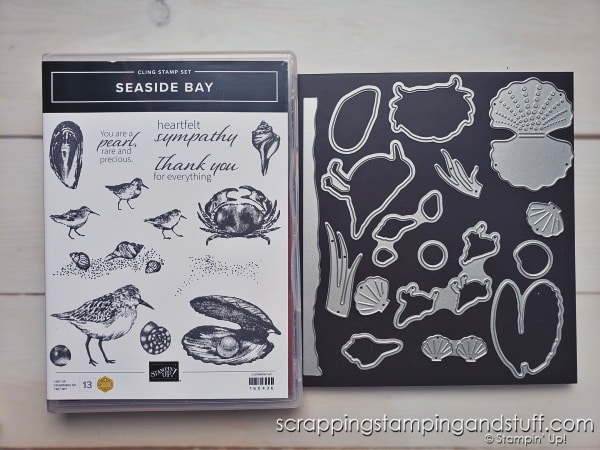
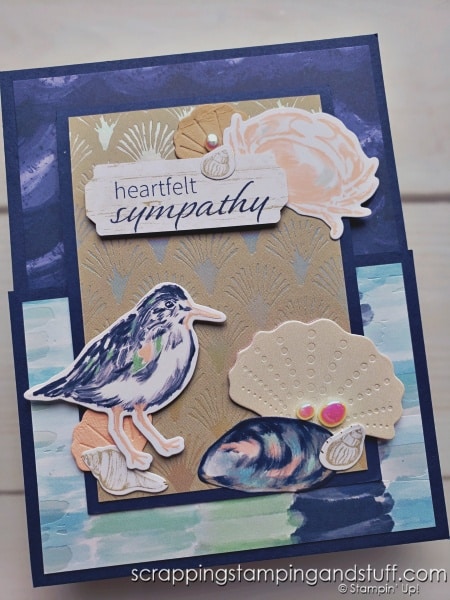
Seaside Bay Card Samples
The cards I created for today’s video feature the Stampin Up Seaside Bay stamp and die bundle. Take a look at the cards I created using this bundle and embossing paste:
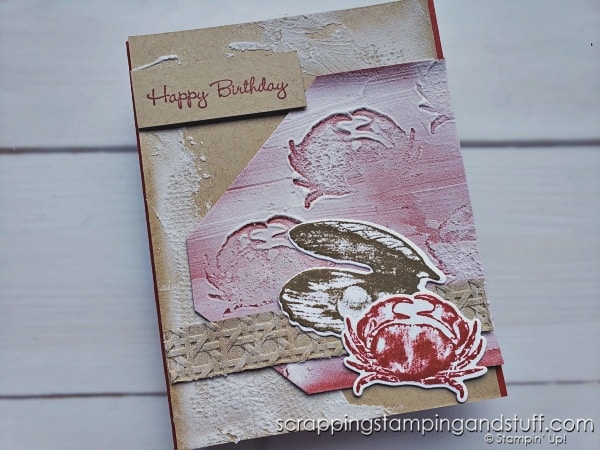
This is such a neat bundle, and I thought it was perfect for playing with paste!
Just for fun, here is a card sample created with this bundle (but no texture paste).
How To Use Texture Paste For Card Making Video
Watch along here to learn more and to see many of the techniques mentioned above!
Get started with embossing paste today! Order your supplies below!
Get Your Supplies Here
Product List


")
Learn To Make Cards
Shop Supplies
Rewards Program
Join My Amazing Team
Thanks for visiting to learn how to use texture paste for card making!
Excellent video, Anna!
Another thing I never thought about is adding embossing power to the paste. Your card turned out beautiful! Thanks for sharing!!
Happy New Year!
Thank you, happy new year!