Welcome to Cardmaking 101 Lesson 7: Using Punches for Cardmaking and Scrapbooking! I’m really enjoying getting back to the basics to help beginning crafters out there learn how to stamp and help you more experienced crafters learn more! If you are new here and want to start at the beginning with Cardmaking 101 Lesson 1, click here. Otherwise, let’s learn about punches!
Using Punches for Cardmaking and Scrapbooking
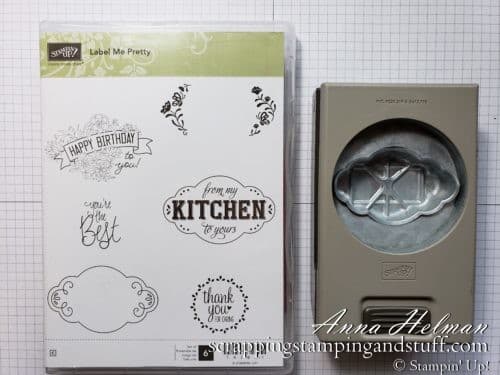
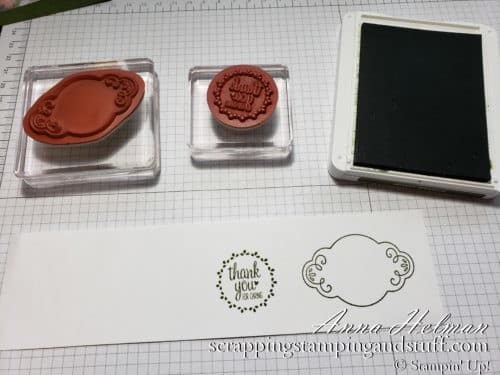
For today’s lesson, we will be using the Stampin Up Label Me Pretty stamp set to make the simple, yet lovely card shown below.

How to Open Stampin Up Punches
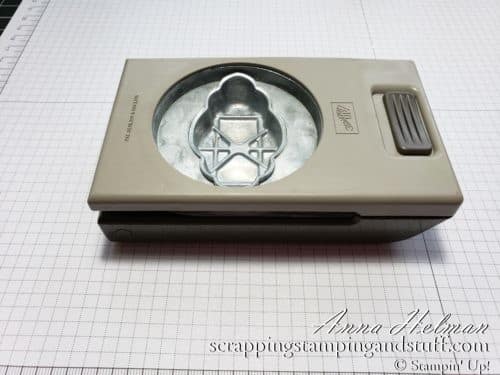
First I want to share how to open Stampin Up punches. In the photo below, the punch is locked into the closed position for storage. This is an awesome feature of Stampin Up punches! While many other punches take up GOBS of space in your craft area, our punches are very neat and trim, making them soooo much easier to store.
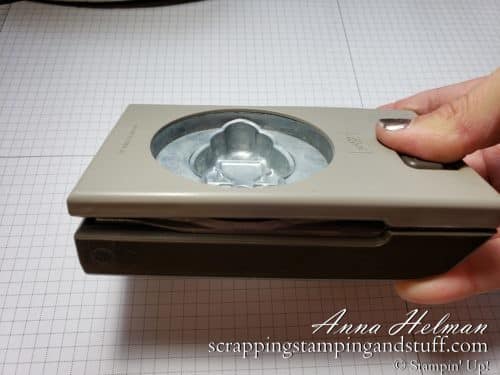
When you’re ready to use the punch, you’ll need to unlock it. Do so by holding the punch as shown below, and squeeze it top to bottom while using your thumb (or other hand) to move the small button into the unlock position.
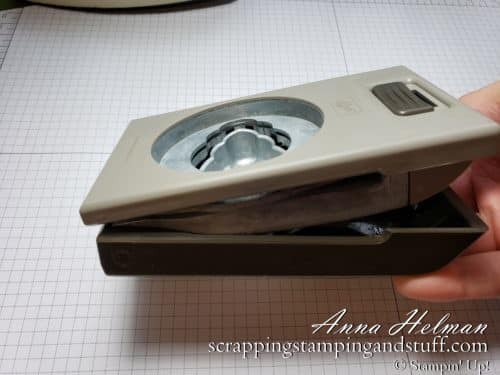
Now you can release your grip, and the punch will open up. It’s ready to use!
Making a Simple Handmade Card
While it is possible to use all sorts of punches with all sorts of stamps, I will be showing today’s example using one of our coordinating stamp and punch sets – the Label Me Pretty stamp set and Pretty Label Punch. This is another one of my favorite things about Stampin Up as a company – how we offer so many coordiating products and how easy they make it to create beautiful projects! Keep reading and you’ll see what I mean!
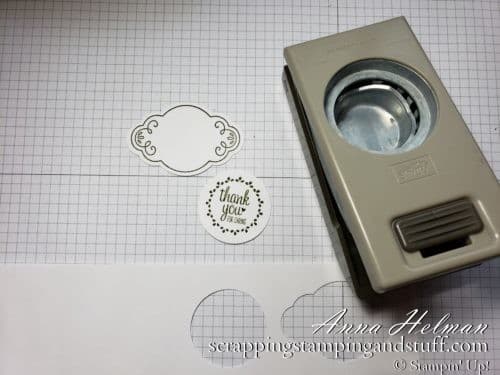
First we will stamp two images for our card – the thank you greeting and ‘pretty label’ shown below. I used Mossy Meadow ink. Would you like to learn more about stamping? Do that here.
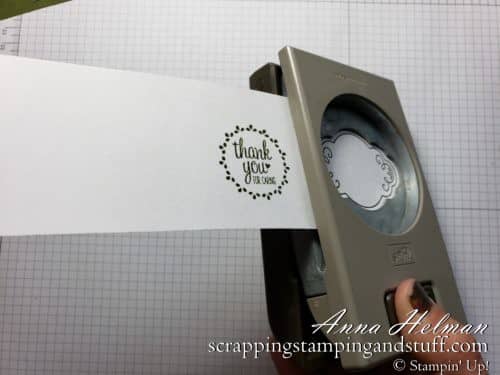
Now we will punch them out. I do this by holding the paper in my left hand and the punch in my right. The goal is to line up the stamped image inside the opening of the punch.
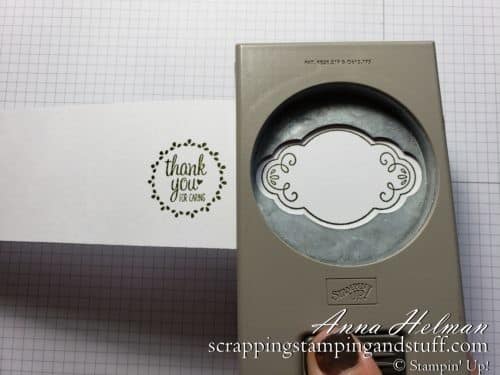
Here is a handy tip. You can squeeze the punch with your right hand (or reverse this if you’re left handed) just enough to hold the paper in place, but not so hard that it actually punches through. This allows you to make small adjustments to the alignment of the stamped image. Once it’s in the exact spot you want, then squeeze the punch all the way to punch out the image. Another plus of our punches is that they don’t require a lot of force to punch through paper – an average squeeze will do!
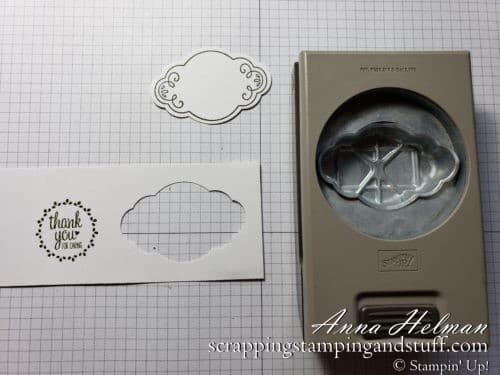
Here you can see our very pretty label, already stamped and punched!
Next I punched out the greeting using our 1 1/2″ circle punch.
Here are all of the materials we need to make this card.
- The stamped and punched pieces we prepared above
- 5 1/2″ x 8 1/2″ card base
- 3″ x 5 1/2″ piece of designer paper from the Perennial Essence paper pack
- 4″ x 5 1/4″ white cardstock, with greeting stamped for the inside
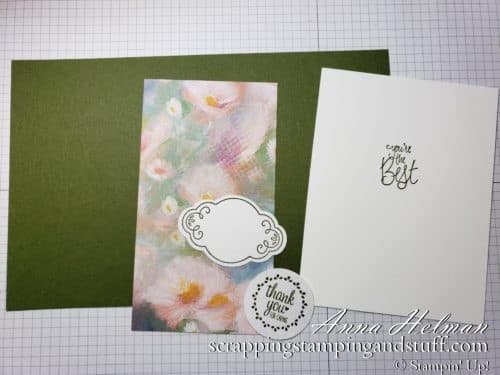
To make the card, I first folded the card base in half, then attached the designer paper and label punch using Snail adhesive. I put two Dimensionals on the back of the circle punch, then peeled off the paper backing and attached it. Learn about adhesives for papercrafting, and how to use them, here.

The greeting for the inside of the card is also from the Label Me Pretty stamp set. I stamped it with Mossy Meadow ink, then attached it to the inside.
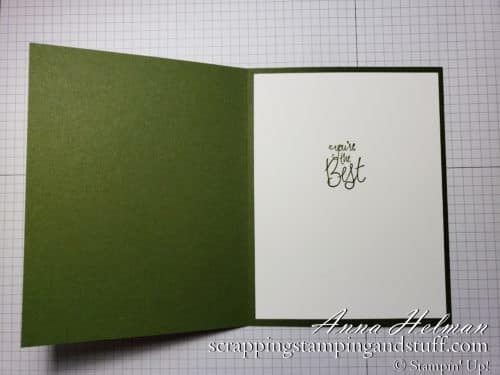
Here it is – our completed card! It was so very easy using a few of our punches, and that my friends is why I love punches so much. They make it easy to make beautiful projects. No creativity required!
Make sure to stop back for my next Cardmaking 101 lesson and subscribe to my blog so you don’t miss out on any future lessons!
Please make me your Stampin’ Up! demonstrator and order from me using the product links at the bottom!
- With your first order, you’ll receive a FREE annual catalog from me! Seasonal catalogs are also mailed to regular customers.
- You’ll earn free gifts or free stamps through my Stampin’ Rewards customer loyalty program!
- When you order $150 or more, you’ll earn hostess credit through Stampin’ Up!
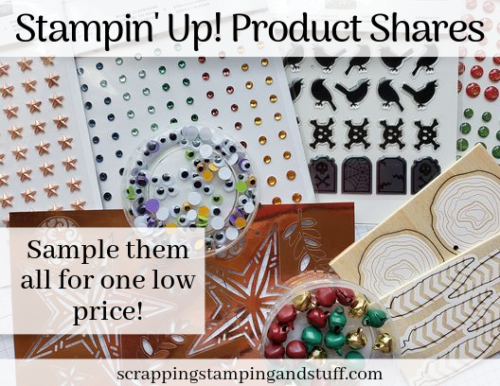
- Sample all of the papers, ribbons, and embellishments that Stampin Up has to offer with Product Shares.
- Check out my current Project in the Mail, Tags Tags Tags (shown below)!

Order the products I used and make this project yourself!


 Circle Punch")


[…] stamped the bats with Memento black ink, then colored them with Stampin’ Write markers and punched them out with the coordinating bat punch. I used Stampin’ Dimensionals behind them, which are little […]