Hello, my crafting friends. I have a question for you. Do you ever have fumbly fingers when you’re trying to pick up and place small pieces onto your craft projects? I sure do! I hear from crafters with arthritis or tremors who really struggle in this area. Even though I don’t have either of those, my fingers still don’t always cooperate with small pieces. If you’re in the same boat, I have a tip to share with you today that may help when you’re placing dimensionals or foam dots on your projects. I find it very helpful, so hopefully you will too!
Dimensionals
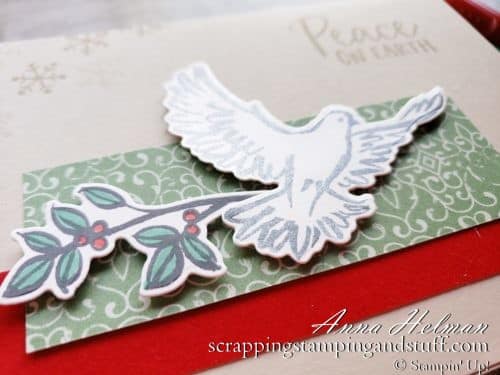
Dimensionals, or foam dots, are the perfect adhesive to ‘pop up’ parts of your projects. I use them all the time to add something extra to my projects without any extra effort. You can see in the photo below that the dove and branch are popped up using dimensionals.
The Old Way To Apply
The normal way to apply dimensionals is to pick them up one at a time and place them onto the back side of your paper. Then you need to remove the paper backing. This can be time consuming and sometimes difficult with fumbly fingers like mine.
The New Way
I recently saw a trick that uses the Take Your Pick tool to make this process quicker and easier. I’ll describe below how to do this.
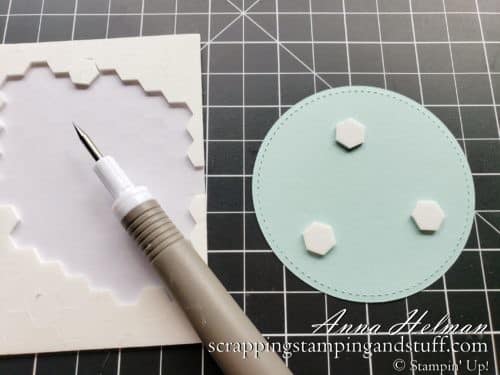
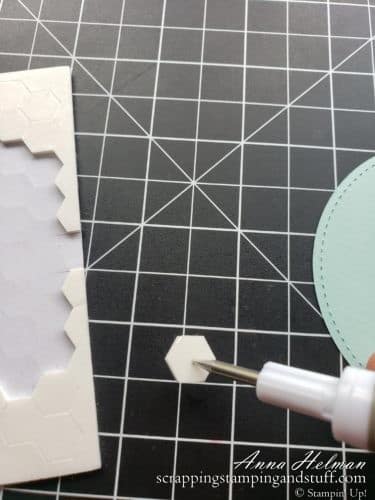
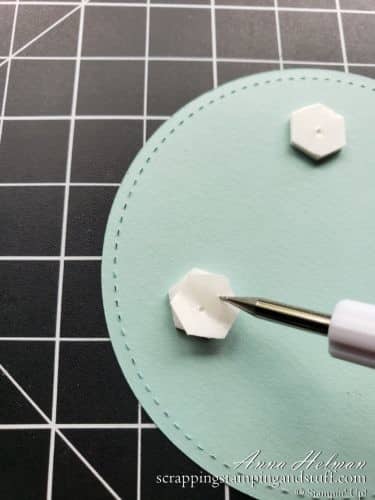
The first step is to use the piercing end of the tool to poke into one of the foam dots.
Next, lift it up to remove it from the sheet. You’ll want to pull away from the other dimensionals to remove it easily. If you lift towards the other dimensionals, it will want to stay stuck instead of breaking free.
Next, place the foam dot on your project. When you lift your tool back up, the dot will stay stuck.
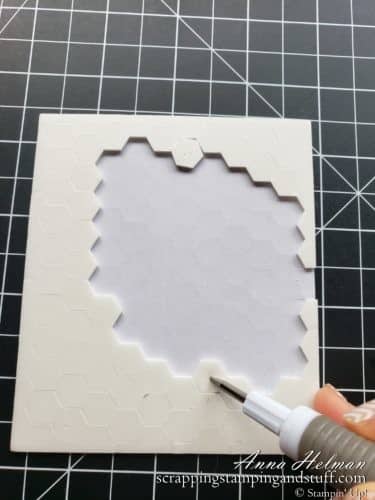
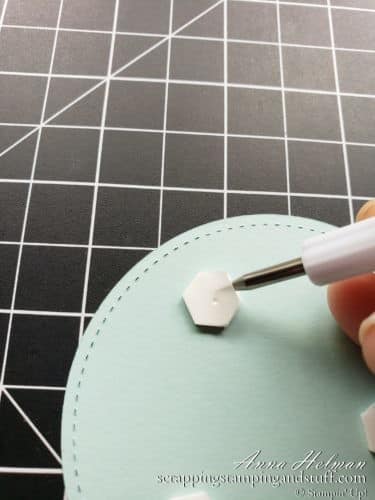
The last step is to remove the paper backing, which can also be done with the Take Your Pick tool. This takes a little more practice. There are two ways I’ve found to do this. First, you can poke through the paper backing near the edge and lift upward to remove it.
The second option is to use the tool to lift up at the edge of the backing.
I am loving this tip, especially for lifting and placing the dots. Try it and see what you think!
Video Overview
I show exactly how to do this in my video tutorial. Please watch along!
I hope today’s tip can help your paper craft projects be a little easier and a little more fun. Thanks for visiting. Please stop back again soon!
Don’t Miss Out!
Please make me your Stampin’ Up! demonstrator! Earn rewards points towards free stamps PLUS a gift when you order using September host code: 2FQZQEEY. PLUS, with your first order, you’ll receive free catalogs in your thank you package!

Sign Up For My Upcoming Virtual Card Classes!
Order the products I used and make this project yourself!


You May Also Like:
How To Tie A Bow For Cards, Crafts or Gifts – 10 Tips For Tying A Perfect Bow Every Time
[…] Quick Tip To Apply And Remove Backing From Foam Dots […]